Posted on Leave a comment

Humble Beginnings – About Us


The idea started while looking online for a complete kit that had everything needed to build a wheel: a hub, rim, spokes cut to the right length, and nipples. Affordable parts, matched and ready to go. I couldn’t find anything .


That sent me to the local bike shop. The owner, a grizzled older mechanic who seemed a bit bothered by my lack of knowledge, walked me through spoke length calculation, truing stands, dishing tools and tension meters. He said if I wanted to build a wheel, he could order the parts and make sure I had the right spokes. I picked my parts and waited. I was glad someone was there to help, and I think he took some pride in sharing what he knew.

Years ago this was my introduction to wheel building, planting the seeds for this business.
One thing he said stuck with me: “Building a wheel is pretty straightforward. The spoke calculation is the hard part.” He wasn’t entirely wrong. Spoke length depends on hub flange diameter, flange offset, rim ERD, lacing pattern and some trigonometry. There are online calculators now, but they all give slightly different results from the same inputs, which tells you something about how many variables are involved.


Some people enjoy that technical challenge. At the time, I just wanted a good wheel that I built myself, and the parts to do it with.


That’s what these kits are. Each one includes a hub, rim, spokes cut to the correct length, nipples and rim tape. Every kit has been vetted through an actual build and real world testing, and each combination of components is chosen for both value and longevity. No spoke calculations, no second-guessing compatibility, just parts that are ready to build.
Wheel building is as much art as science. It can be fun and rewarding, and it can also be challenging. Anyone with the right knowledge and motivation can build a decent wheel, but if you’re only looking to save a few bucks, or you aren’t interested in learning proper technique, these kits aren’t for you. If you’ve wanted to give wheel building a try, or you already have experience and just want a strong hand-laced wheel from quality components you know will work together, you’re in the right place.


And if you’d rather go down the rabbit hole and design your own build, calculations and all, head over to our wheel building basics post for the resources we’ve found most useful.

Posted on Leave a comment

The Truth About Truing Stands

So you don’t want to buy an expensive truing stand?

The truth is that your instinct is partially correct. There are ways around buying a pricey stand or a cheap and possibly chintzy one.

Our goal is to offer truing stands on this site. We can’t yet, because we haven’t been able to source one that we would feel good about offering, one that’s good, but also wont cost too much. We’re not going to sell you a wobbly tool. Until we find one that meets our standard we’ll tell you what many wheelbuilders already know: a truing stand is one of the easiest precision tools in cycling to build yourself, and a homemade one can true a wheel to the same tolerance as a professional stand.

Strip away the paint and the price tag, and a truing stand does two things:

  1. It holds the wheel by its axle, rigidly, so the wheel can spin freely.
  2. It holds a fixed reference point close to the rim, so you can see (and hear) where the rim deviates as it passes.
    Some premium stands do a third thing, which is to allow for a type of “automatic” dishing while the wheel is being trued using centered calipers attached to the stand. But this feature generally comes with professional models, and those can get pricey. And even then, the surest way to check dish is with a dishing tool.

“Automatic dishing” aside, the precision is about the connection between the axle mount and the reference point. Any structure that holds those two things in a fixed relationship, without flexing when you manipulate the wheel and twist on a spoke wrench, is a truing stand. Wood can do this. So can a steel fork or a bike frame.

It’s worth noting that an expensive stand does not true wheels better than a rigid homemade one. Here’s why many pros and bike shops use the higher end truing stands: They tend to be more durable for daily shop use. They’re faster and more convenient, with self-centering jaws, calibrated indicators, and built in little knobby bits for quick adjustments. If this is one’s profession and they build wheels weekly, the convenience and durability without fuss is worth paying for. If it you’re building a few wheels a year, it’s just a luxury.

General options for stands:

Option one: the bike is the stand

A tried and true method is to use a bicycle as a truing stand. Flip your bike upside down (or put it in a workstand), leave the wheel in the dropouts, and you have an axle mount that is perfectly matched to your axle. For a rim-brake bike, the brake pads are your lateral reference to visualize the wobble, allowing you to toward or away from spots that stand out.

Another and perhaps better way is to strategically attach zip ties. Cinch a zip tie around each fork blade (or seatstay) and trim the tail so it just clears the rim sidewall. Snip a little at a time until it barely scrapes at the highest point. A zip tie tail is a surprisingly sensitive indicator. You can hear a scrape of a quarter millimeter, and you get one on each side of the rim, which brake pads on a centered caliper also give you. Zip-ties are also be slightly adjustable by turning them one way or the other on the frame.

This method does have some limitations. Firstly, it’s awkward. You’re potentially working at an odd height, the wheel is captive in the frame, and checking dish means pulling the wheel repeatedly. It works, but is can be slow. Also it’s not really all that portable. And getting the proper alignment of things things like brakes or zip-ties takes some practice.

Option two: the old fork

If you have a retired steel fork, and if you’re reading this site you may already have three, you have the makings of a proper bench stand. Clamp the steerer in a bench vise, or better, bolt the fork to a plank: drill a hole for the steerer through a block screwed to a plywood base, and clamp the fork crown down. Drop the wheel in, close the quick release, and add the zip ties.

This gets the wheel to bench height, holds it dead rigid, and costs little to nothing. The dropouts locate the axle exactly the way a frame does, which is the only alignment that matters in the end. Plenty of good wheels have been built on exactly this rig. Its limitation is width. A front fork takes front wheels (100 mm spacing). For rear wheels some have cut the triangle from a scrap frame, but that’s probably overkill, considering there are far easier ways to build a stand. Also these methods are limited to the spacing between the dropouts. A 135 mm rear hub wont fit into a 100 mm fork for truing.

Option three: build your own

If you’re really set on having your own actual truing stand and still don’t want to buy one, an excellent one can be built. There are many plans online, and Roger Musson’s book Wheel Building details one of the most elegant designs we’ve seen. Because these resources are easy to come by, we’re not going into detailed plans here. But the takeaways are: The materials can basically be whatever you want, as long as the stand meets the rigidity and reference-point criteria listed above. Wood is rigid, light and easier to work with than metal. The base should be wide and somewhat heavy or able to be securely attached to your work surface so as to not tip over when spinning the wheel and turning nipples. Always use a dishing tool if you want truly accurate dish.

How true is true enough?

A lateral wobble under 0.5 mm is a considered well-built wheel. But there’s something really satisfying about dialing in a wheel so round and true that the imperfections are virtually undetectable. I’ll be honest though, I’ve built a bad wheel myself that looked perfect on the stand, but lost its shape after about 20 miles. The truth is that a perfectly true wheel on the stand wont stay that way on the bike if the principals of the craft aren’t followed. This is what separates a good wheel from an ok or even bad wheel, and really it comes down the builder not the stand.

If there is anything we’re trying to say in this somewhat bloated treatise it is this:

Wheel building rewards patience and punishes hastiness, sloppiness and thoughtlessness. A truing stand is a simple device that can cost virtually nothing or an entire paycheck.

There’s an old adage that goes, “It is a poor craftsman that blames their tools.” And just like this year’s winner of the Tour de France could probably beat 99 percent of cyclists while riding a huffy, a good, competent wheel builder can put together a durable, well built wheel using bike forks and zip ties.

The good news is this: not everyone can win the Tour de France, but pretty much anybody can learn to build a good wheel and the truing stand is only a small part of the equation.

Posted on Leave a comment

Our Philosophy

At the core of this business is the small but beautiful idea that riding bikes is one of the most simple and natural ways for a human to interact with the world. The act doesn’t need to be justified by technology or a finish line or speed or watts or even fitness. Really it’s about the feeling of moving through space under your own power, going where you want, exploring and seeing what’s there.

Bikes belong to everybody. That includes the fastest among us shaving grams to make every second count or the riders who venture out into the wild on equipment that pushes the limits of technology and the edges of a bank account. We’re not here to throw shade. Those pursuits are genuine and valid and real, and it’s a part of what makes this culture rich and diverse. But when it comes down to it, that’s just not our wheelhouse. We’re more about practicality, longevity and maybe a little adventure. It’s the long way home or the unnecessary detour to check out a strange alley or a new trail, with utter disregard for time and speed and performance. It’s the choice to be comfortable, intrepid, and curious.

We’re a little concerned that the industry keeps telling one story, which has always been there, but it just happens to be really loud right now: newer, lighter, faster, better. While there’s nothing wrong with this story, it seems to be drowning out the other stories, our story, and potentially your story. Sometimes it comes across as a rule book, like there’s a correct bike, a correct way to ride and specific uniform you have to wear to be allowed in, which, let’s face it, draws some people in, but unfortunately it can also push others away.

This limits what bikes can be, what bikes are.

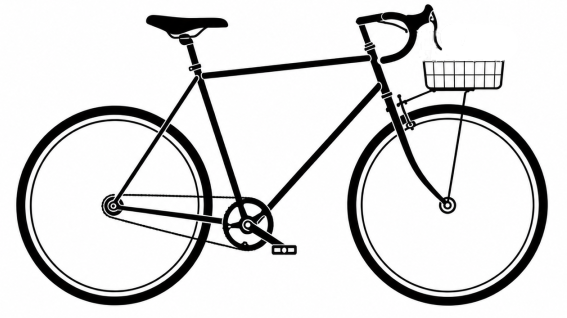
We ride in whatever’s comfortable. We have baskets, carry too much weight, have kickstands, or put modern mountain bike parts on an 80’s touring bike. Our rigs are old and heavy, new and strange, light and fast. It doesn’t matter. We can ride for solitude or community. We ride to get to a specific place or simply to wander and explore. Maybe we just want to skip the car or ride to stay healthy. But we think that most of us, from the spandex-clad Strava KOM to the person riding a tank of a single-speed beach cruiser, are experiencing something universal among those who choose to hop onto that saddle, the joy that comes with riding a bicycle. And maybe a little suffering (you know who you are.)

This is also a major reason why WheelBuildingKit.com exists. Of every part on a bicycle, the wheel is the one where taking your time actually makes a difference. Sure, any old factory built wheel can be pretty good, but a wheel you lace and tension yourself can be so much better, longer lasting and yours. There’s something magical about taking a bare rim, a hub, and a fistful of spokes and turning them into one true, round, dependable thing with nobody’s hands but your own. It imbues a bike with personality and adds to the quality of its soul. Yes, bikes have souls, if you let them.

But the barrier for entry has always been steeper than it should be. Picking spokes and parts and gathering all the accouterments to build a wheel is kind of a hassle. Figuring out which hub plays nicely with which rim assumes you already know the answer. And the parts catalogs are built for shops moving volume, not for one person building one solid wheel for a bike they love, a bike infused with memory, history and spirit.

That’s the gap we fill. Every kit is simply a hub, a rim, and a set of spokes we’ve already cut to length and chosen to work together. But these kits are so much more than that. They’re a gateway into greater connection with this amazing, simple conveyance.

We have curated our wheels to fill a niche that seems to have been ghosted by big-bike. We offer dynamo setups for the people still out there after sunset, or just wanting to keep their phone charged over the days of a long tour, or a trip to the farmers market. We offer rim-brake builds for all the bikes the market decided to forget. We design builds with high spoke counts, for bikes with wide gearing, old-school geometry, and lugged frames. These wheels are the ones nobody mass-produces because there’s no crowd to sell them to. We cut every spoke in-house, so what lands on your doorstep is ready to build, not a scavenger hunt for a donor bike on an online marketplace.

We’re not counting on selling stacks of wheels. We’d rather help you build the one that’s right, and in that process the crafting of the thing part of the ride instead of a chore on the way to it.

Our parent company is called Velolento, which is an Italian / Spanish mash up meaning “slow bike,” but the name is really about spirit, not pace. It’s a philosophy not a dogma. Ride intentionally, pay attention, make room for others. Treat cycling as something you live rather than something you perform.

If you believe a good ride doesn’t need a finish line, and you’d sooner build the wheel than just hand over a card for one, you’ve found your people.

Welcome to WheelBuildingKit.com. Let’s ride.

Posted on Leave a comment

Wheel Building Basics

This is not a comprehensive how-to-guide on wheel-building. It is meant only as a general overview.

Wheel building is the process of lacing a hub to a rim using spokes, then applying tension and aligning everything so the result is round, without wobbles , and durable. Most first wheels come out usable, and with enough time, and effort completely true. A reasonably patient person can build a decent wheel in 2-8 hours. Your first build may take forever, but if you’re like us you’ll love the process. Experienced builders do it in under an hour or two.

THE COMPONENTS

A wheel has four ingredients: a HUB (the center), a RIM (the outer hoop), SPOKES (typically 28, 32, or 36), and NIPPLES (small threaded fasteners that connect spokes to rim and act as the tension adjustment). Spoke length is specific to the hub/rim/lacing combination and must be calculated. Unfortunately, getting this wrong is the most common beginner mistake. And that’s where our kits shine, because we take that out of the equation.

LACING PATTERNS

There are several common lacing patterns, but here we’ll focus on 3-cross.

Wheels built in a three-cross or cross-3 pattern are thusly named due to the fact that each spoke crosses three others on its way from hub to rim. This is the default for nearly all rear wheels and most front wheels. The crossings let the spokes transmit torque (pedaling, braking) by pulling roughly tangent to the hub flange rather than radially. This lacing pattern has quite a few advantages including strength, comfort, and longevity. For this reason all of our wheel kits use the three-cross lacing pattern. It’s not exotic but practical , strong, and time tested.

Other lacing patterns include 2-cross, 4-cross, and Radial. While these may have advantages such as aesthetics, aerodynamics and minuscule weight savings, they sometimes sacrifice strength and durability, or are a necessity depending on the type of hub (4-cross). Wheels build using the 3-cross pattern are generally considered to be the best recipe for creating a long lasting, strong wheel build.

THE BUILD SEQUENCE

This is not a comprehensive guide to putting together a bicycle wheel. While we’re pretty good at building wheels, we won’t pretend to the the authority on the subject, because there are already so many great resources that will help you. Why try to reinvent the wheel.

  1. LACING. Typically the spokes are inserted one at a time following whatever patterns Done correctly, the result is a loose, floppy wheel with all spokes attached but minimal tension. This takes most of the time on a first build because you’re constantly second-guessing which hole goes where. Sheldon Brown’s lacing guide is the canonical reference and walks through it hole by hole. We’ve e had very good luck using and already built wheel as a physical reference model when lacing
  2. INITIAL TENSIONING. You thread each nipple down the spoke with a screwdriver or nipple driver until the threads are either visible for just a millimeter or so or just disappear. Either way is fine as long as all the they are all equally in or just sticking out. This gives every spoke roughly equal starting tension. The wheel now holds its shape but is nowhere near rideable.
  3. TRUING AND TENSIONING. This is the craft part. Using a truing stand (or the bike frame as a stand-in), you bring the wheel into four kinds of alignment, working all of them together rather than one at a time:
  • RADIAL TRUE: roundness with no high or low spots as the rim spins
  • LATERAL TRUE: flatness with no wobble side-to-side
  • DISH: the rim is centered between the ends of the axle (critical for rear wheels because the cassette makes the hub asymetrical)
  • EVEN TENSION: every spoke on a given side carrying similar load

Builders methodically and gradually raise tension across the whole wheel, going around in passes (often quarter-turns), correcting wobbles by tightening on one side and loosening on the other. A tension meter helps to assure tension is in right range. Non disc / rim-brake font wheels typically have equal spoke tension in the left and right side due to the flanges often being both symmetrical and the same size. Disc brake hubs are often asymmetrical in flange diameter and offset. This same asymmetry often applies to rear wheels where the drive side spoke tension is typically much greater and the non-drive side substantially lower. You can build without a meter by feel and pitch (plucking spokes to hear similar tones), and plenty of good builders do, but a meter can help decrease the learning curve and give a first time builder valuable insights.

  1. STRESS-RELIEVING.One method is to squeeze pairs of parallel spokes hard with your hands, or press down on the wheel against the floor at various points around the rim. We are proponents of the Sheldon Brown method of running an object between the outermost cross of the spokes. Wooden chopsticks are great for this because they tend to not scratch, but a screwdriver or wrench handle will do. This unwinds any twist (windup) in the spokes from tightening and seats the spoke elbows into the hub flange. The wheel will go slightly out of true again. Then fix the imperfections, and repeat until stress-relieving stops changing anything. Skipping this step is why some wheels go out of true a week after the first ride.

WHAT MAKES A WHEEL GOOD

A well-built wheel isn’t just true, it has EVEN TENSION across all spokes on each side and is STRESS-RELIEVED. A perfectly true wheel with wildly uneven tension will de-tension itself within a few hundred miles. This is the part that separates a working wheel from a durable one, and it’s invisible to anyone looking at the finished product.

TOOLS YOU’LL NEED

Minimum tools needed: spoke wrench sized to your nipples, a screwdriver or nipple driver, frame/fork as a truing stand, oil for the spokes and nipples.

Ideal tools: dedicated truing stand, spoke holder, nipple driver, dishing tool, tension meter, and oil for the spokes and nipples.

A truing stand is perhaps the upgrade that matters most after the wrench itself.

WHERE TO GO FROM HERE

Free and paid sources worth knowing:

  • Sheldon Brown’s wheel-building article: This is a foundational and maybe slightly dated guide, but still excellent.
  • Roger Musson’s “Professional Guide to Wheel Building” is purchased as paid PDF from his website. It is widely considered the best single resource. It’s certainly our go to for its clear, no-nonsense instruction.
  • The Park Tool video series on YouTube can give you a visual on how it works.
  • Jobst Brandt’s “The Bicycle Wheel”: This offers the basics and a technical deep-dive to help the reader understand why everything works the way it does. It’s out of print, but there’s many used copies available on online market places.